
There are many elements of a wedding that are just nice to have done by someone else (i.e., cake, linens, catering, photography, etc.), and I was truly blessed to be able to hire outside vendors for many of those. Our venue location took care of a lot of the decor, which made life so much simpler in the end. But there were certain elements that I knew I could tackle myself, and I am so glad I did. It saved a ton of money and gave me a fun creative outlet. Granted, it only works if you have the time, patience, and an army of helpers to make sure it all gets done!
Today's post is filled with the DIY projects I tackled for the wedding, so feel free to browse through (or skip) these ideas. If you're interested in learning more about how to do any of the things listed, let me know! If you don't want to know the details of "how-to," then just feel free to scroll through the pictures :)
DIY- Will You Be My Bridesmaid? Cards
I wanted to think of a creative way to ask my bridesmaids to stand beside me on my wedding day. I didn't come up with a creative thing to do, but instead decided to get creative with something to give.

Materials: card stock, adhesive, vellum, vellum tape, sheer ribbon, scrapbook pearls, Prima flowers, brads
Tools: paper cutter, computer/printer
DIY- Invitations
This was by far the largest project I chose to undertake for the wedding haha. My poor friend Laura. I stamped this project as a Maid of Honor "To-Do" and there were many late nights and long afternoons trying to get these things done. But in the end, I was really pleased with how they turned out. And I spent way less $$ achieving the design I wanted for the invitations. They were not hard or expensive; but they were time-consuming, so beware :)
Step 1: Cutting & Scoring
Cut a 10"x7" base

Score the 2 side panels at 2.5" each side (so you should have a 5x7 center)

Mark off the center point so you can center the circle cutter and the ribbon slits

Center your circle cutter to round off the edges

Nice rounded edges :)

Fold over edges

Repeat. And repeat, and repeat, and repeat....

Materials: card stock
Tools: paper cutter (with scoring blade), computer/printer, Fiskars circle cutter, cutting mat,Step 2: Ribbon
Cut the ribbon to the desired length- enough to tie around the whole invitation, including a bow

Cut slits in the folds just long enough for the ribbon to thread through
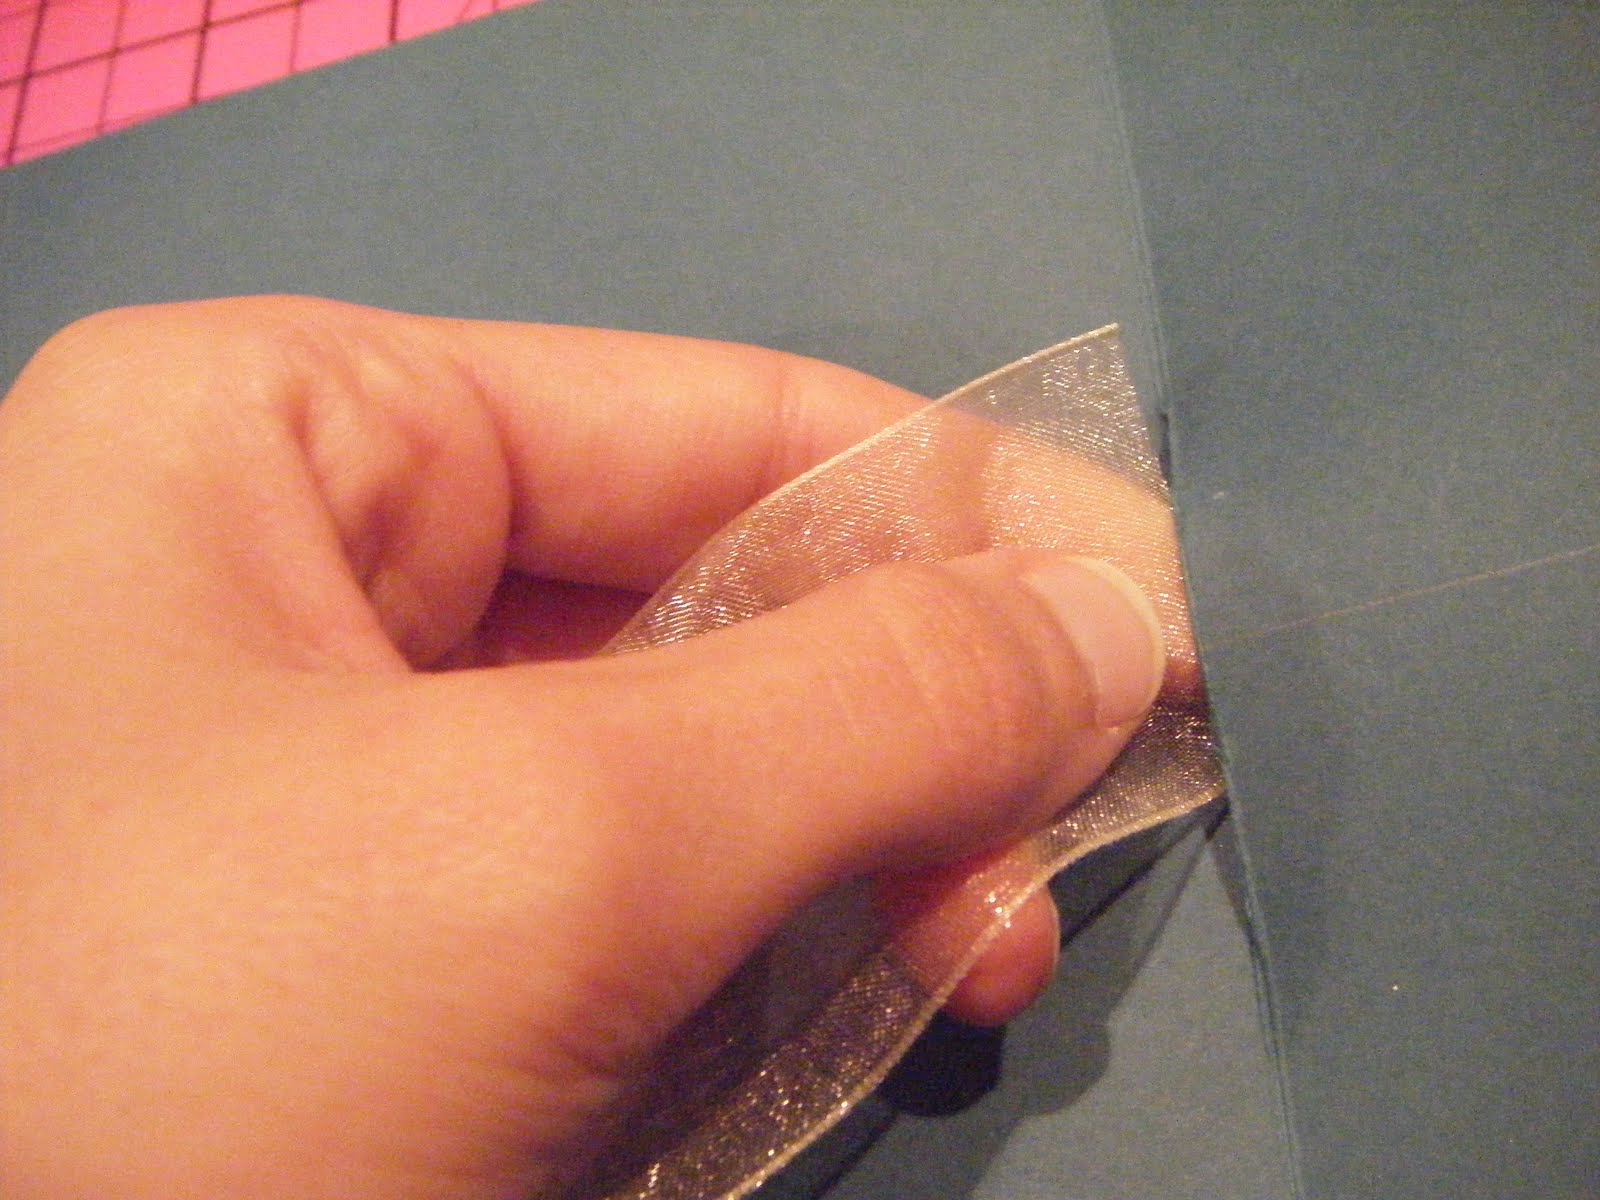
The ribbon will be under the actual invitation...

...and will eventually wrap around to close the invitation like a gift

Tools: paper cutter, scissors
Step 3: Inserts
For the inserts, I included the following:
- 5x7 Invitation (attached to inside)
- 3.5x5 RSVP card with self-addressed stamped envelope
- 4x6 Direction/Accommodation card
Attach your 5x7 invitation card to the inside center

I printed ours on linen paper I found at an office supply store

I used a corner punch to add extra detail to the direction insert...

...which I then attached to card stock

I don't have a picture, but I printed the RSVP cards on ivory card stock and just placed in the inside flap of a 4 Bar envelope.
Materials: card stock, adhesive, linen paper, 4 Bar solid envelopes (3 5/8 x 5 1/8 size)
Tools: paper cutter, computer/printer, corner punch
Step 4: Stuffing, Addressing, Stamping
The final step is best completed in an assembly line fashion...

...and having your MOH to help in the wee hours of the night helps too!

The pretty wedding stamps just make me happy :)

Tools: computer/printer, your tongue to lick the envelopes closed :)
I bought all of my card stock and envelopes for the invitations from Paper and More- they were fabulous! They have the best online bulk prices and a great variety (and quality) of products. It was hard to find that teal color, but they came pretty close! I bought the ribbon from Paper Mart- also a great deal on bulk ribbon! I was looking for a particular size, and they had the best selection. Everything else was purchased with a Michael's/Hobby Lobby coupon :)
DIY- Flower Girl Baskets
These were really cute and super easy to make. I bought a set of 2 baskets from Hobby Lobby (they were 2 different sizes, which was perfect since we had 2 different sized flower girls!) I weaved a teal ribbon through the top layers of the basket and tied a bow at the corner of the handle. I cut off a silk rose stem and stuck it through the ribbon, then filled the baskets with silk rose petals.


Materials: baskets, ribbon, silk rose stems, silk rose petals
Tools: scissors
DIY- Ceremony Programs
I decided not to have a ton of decor for the ceremony, mostly because I didn't want to detract from the gorgeous view of downtown Dallas. So to add a little color to the ceremony, I decided to have hanging ceremony programs at the guest chairs.

Materials: card stock, ribbon
Tools: computer/printer, paper cutter with scoring blade, hole punch, adhesive
DIY- Aisle Marker Initial Frames
This is a fun and easy way to mark the bride and groom side of the aisle, while adding the personal touch of your initials. I painted the wood frames and letters, created the backgrounds with scrapbook paper, adhered the letters to the background,and then attached the hangers and the ribbon.

We now have them displayed in our laundry room as a fun memory :)
Materials: open back wood frames, monogram wood letters, card stock and scrapbook paper, ribbon, paint, frame hangers, adhesive
Tools: paper cutter, paint brush, hammer
DIY- Guest Sign-In Cards
Instead of a traditional guest book, we asked guests to "sign in" by writing us a note. These are such a fun memory to have, and I look forward to reading through them several years into our marriage to remember all of the well wishes and support we received on our wedding day. I fancied ours up with a corner punch, but you can even just have cut pieces of card stock and you're set! We placed the cards in a basket, provided pens, and had guests place their notes in a decorative glass vase (which for us, was a sweet gift from the BSF crew!).

We had countless sweet notes from family and friends, but this was definitely one of my favorites :)

Materials: card stock, adhesive
Tools: paper cutter, corner punch
DIY- Escort Cards
Because of our limited space, we had to assign seating for our dinner reception. In order to make the process simple for guests, we used escort cards. We fanned them out in alphabetical order on a round table, just to add an extra touch of decor as guests arrived at the reception.

Materials: card stock, linen paper, adhesive, scrapbook flowers, brads
Tools: computer/printer, paper cutter
DIY- Table Number Cards
I wanted a fun way to incorporate our fabulous engagement pictures, so I decided to make those the focal point of our table number cards. I had wallets printed and then attached them to square table tents. This was also one of the ways I could incorporate teal into the reception, since I could find card stock and ribbon that matched the bridesmaid dresses, but not linens. It was simple and inexpensive, and definitely a fun personal touch.
This one was extra, so it somehow ended up on the drink table haha :)

Materials: card stock, adhesive, photos
Tools: computer/printer, paper cutter with scoring blade
DIY- Flowers
Flowers are beautiful, but they are also very expensive. I knew early on I was going to have to make some decisions on where we would spend our budget. I am so thankful for my event planning background, as it was easy for me to cut out a florist and do the floral myself. We didn't have grand elaborate floral arrangements, but flowers die anyway, so why not keep it simple?
I ordered bulk gerbera daisies and roses from Sam's Club and made a few floral arrangements for the ceremony and reception, as well as the bridesmaid bouquets. I rounded up some bridesmaids and we had a floral arranging party a couple of days before the wedding.
Even cute little Miss Evie came to join the flower-arranging fun!


They traveled with us a few places before they made it to the wedding venue....

Bridesmaid Bouquets

Centerpiece for escort card table

Hanging gerbera daisy cones for aisle decor

My sweet aunt had offered to pay for my bouquet, and there were just too many boutonnieres, so I did leave those to the professionals over at the Park Lane Whole Foods Market.
My bouquet- really simple, but I LOVED it!


Mike's boutonniere


No comments:
Post a Comment